Automation guide
Auto rig in Blender: a skeleton on a selected mesh, in one step
Auto rigging in Blender: what a generated skeleton and skin weights get you, the body plans it handles, and the rig work that is still yours afterwards.
Auto rigging is the step where a finished model stops being a sculpture. Mixar does it on the mesh you already have selected: pick the meshes, press Generate, and each one comes back with a fitted skeleton and skin weights already bound, imported into the scene. No export, no upload form, no separate service.
If Mixar is new to you: it is a 3D editor built on Blender, running on Windows, macOS and Linux, with the Blender toolset, shortcuts and .blend files unchanged. What is added is an AI agent inside the application and a set of generation tools, of which auto rigging is one.
Below is what the operation actually produces, the controls that matter, the one import setting that decides whether the result survives being posed, and where the rigging work is still yours.
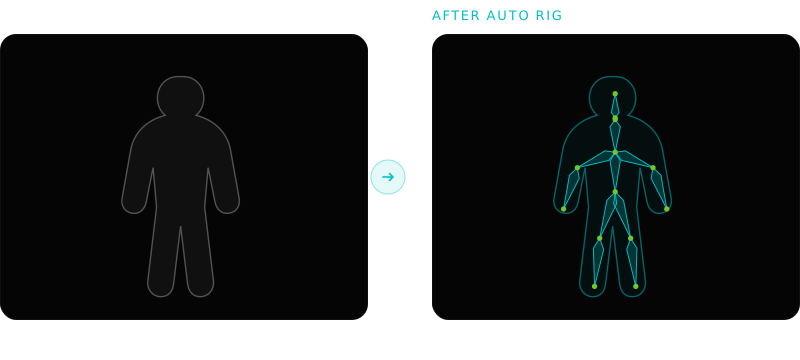
What a rig actually consists of#
"Rigging" covers four separate things, and conflating them is why expectations around automatic rigging are so often wrong.
A skeleton. An armature of bones positioned inside the mesh, with a hierarchy that matches the body's structure: spine up to neck and head, shoulders out to arms, hips down to legs. Getting this right is mostly about placing joints where the anatomy actually bends.
Skin weights. Which vertices each bone influences and by how much. This is what makes the mesh follow the skeleton rather than sit next to it, and it is where most of the manual hours in traditional rigging go: the shoulder, the armpit, the hip crease and the elbow interior are all places where a naive weight assignment produces obvious pinching.
A control rig. The layer an animator actually touches: IK chains so a foot can be planted, pole targets so a knee points where it should, custom bone shapes so the controls are clickable, constraints, and drivers. None of this is required for the mesh to deform. All of it is required for the mesh to be pleasant to animate.
Corrective shapes. Shape keys driven by bone rotation to fix the volume loss a linear skin cannot avoid. Hero-character work, not prop work.
Automatic rigging solves the first two. It does not attempt the last two, and any tool claiming to produce a finished animation rig is describing a very simple one. Blender's armature documentation covers the manual versions of all four if you want the ground truth.
What running it in Mixar does#
The operation is a queued job, not a local solve, so the editor stays responsive and you can keep working while it runs.
Select the meshes
Any mesh objects in the scene. A sculpt, a generated character, an imported model. Selection is the input, so a batch is a rubber-band away.
Choose a body plan, or don't
Leave Rig Type on Auto and the engine detects the structure. Set it explicitly when you already know, or when Auto reads the shape wrongly.
Each mesh becomes its own job
The selection fans out into one job per object, so a queue of six characters runs as six jobs rather than one that fails as a unit.
The rigged model imports itself
Each result lands back in the scene, skinned and posable, without a download step.
Two things about that fan-out are worth knowing rather than discovering. Each object is exported on its own, so one oversized mesh is skipped with a message naming it rather than taking the batch down with it. And the export cap is 150 MB per object, which is generous for a game character and easy to exceed on an unretopologised sculpt. One more reason the auto retopology pass belongs before this one, not after.
- Body plans
- Auto, biped, quadruped, hexapod, octopod, avian, serpentine, aquatic
- Skeleton spec
- Tripo or Mixamo naming, chosen per job
- Input
- One selected mesh per job, exported as GLB, up to 150 MB
- Output
- A skinned, posable object imported into your scene
- Agent access
- Callable by name on a specific object, inside a longer brief
The body-plan list is the part most worth reading twice. Automatic rigging is usually assumed to mean bipeds, and the assumption quietly shapes what people try: a spider, a bird or a snake gets modelled and then rigged by hand because nobody checked. Hexapod, octopod, avian, serpentine and aquatic are all selectable here, which makes the creature side of a project a very different proposition.
The one setting that decides whether the rig survives#
This is a genuine gotcha and it is worth understanding whichever tool you use, because it bites on any rigged glTF that Blender did not author.
Blender's glTF importer has an option called Guess Original Bind Pose. When it is on, the importer tries to reconstruct the pose the mesh was modelled in, on the assumption that the file came from a pipeline that recorded it. Rigs produced by an external auto-rigging engine were not authored that way, and the guess is wrong. The symptom is specific and confusing: the model looks fine on import and sitting at rest, and then the first time you actually pose or animate a limb, the limb collapses toward the body.
Mixar imports auto-rig results with that option off, deliberately. If you are importing a rigged glTF from anywhere else and seeing limbs fold, that is where to look first. The Blender glTF importer reference documents the flag.
The honest limits#
Three more things worth stating plainly.
Detection is advisory, not guaranteed. Leaving Rig Type on Auto asks the engine to analyse the mesh and pick a body plan. That analysis can fail, time out, or return an unhelpful verdict, in which case the job proceeds with a biped skeleton rather than refusing. That fallback is deliberate, because the analysis is known to be pessimistic on externally uploaded meshes that rig perfectly well, but it does mean a non-humanoid subject is worth naming explicitly rather than trusting to detection.
It works best on characters and creatures with a legible body plan. A mesh with a clear trunk and identifiable limbs is what the engine is looking for. A fused blob, a mechanical assembly with no anatomical structure, or a character welded to a large prop is not, and the result will show it.
Weights will need attention on anything close to camera. Automatic skin weights are competent and they are not a rigger's weights. Check the armpit, the crotch, the elbow interior and the shoulder at full range before deciding the rig is done. Pose the limbs to their extremes and look; problems that are invisible at rest are exactly the ones that matter.
Where it sits in the sequence#
Rigging is not an isolated operation, and running it at the wrong point wastes the result.
Rig too early
Rigging a dense unretopologised sculpt bakes weights onto geometry you are about to throw away. Retopologise first, then rig the mesh you will actually ship.
Rig at the right point
Clean, retopologise to a real budget, rebuild the UVs, bake the detail down, then rig. The skeleton binds to final geometry and the weights stay valid.
A practical order for a generated or sculpted character:
- Clean the mesh. Applied transforms, manifold geometry, correct normals. The scene cleanup checklist is the full pass.
- Retopologise to the budget the asset actually needs, and remember that deformation is where automatic retopology is weakest. A character heading into a rig is the case that still wants edge loops placed by an artist.
- Rebuild the UVs, per AI UV unwrapping.
- Bake the high-poly detail down.
- Texture it.
- Auto rig, on the finished mesh.
- Build the control rig, if the asset needs to be animated by a person rather than driven by imported motion.
Steps 1 through 6 are the mechanical sequence, and they are exactly the kind of chain worth briefing in one instruction rather than performing as six separate sessions. The AI agent for Blender pillar covers each pass in turn.
Rigging through the agent#
Auto rigging is one of the operations the agent can call directly, and it is worth knowing how it behaves because the design is opinionated.
Ask the agent to rig, add an armature, add a skeleton or make something posable, and it calls the auto-rig tool on the object you named. It will not hand-build an armature with a script unless you explicitly ask for manual rigging. Bones placed by generated Python, vertex groups assigned by heuristic and weights painted by code are unreliable in a way that is hard to see until the asset is animated, so that path is off by default rather than merely discouraged.
The call is fire-and-forget: the job goes into the queue and the rigged model imports itself when it is ready. The agent will tell you the rig has started, not that it has finished, which is the honest report and worth expecting rather than reading as a failure.
Frequently asked questions
Can AI auto rig a character in Blender?
Yes, for the skeleton and the skin weights. Automatic rigging fits an armature to a mesh and binds vertices to it, which is enough to pose the model and enough for imported animation to drive it. What it does not produce is a control rig: no IK chains, no pole targets, no custom bone shapes, no constraints and no corrective shape keys. Treat the automatic pass as the part that used to take an afternoon of joint placement and weight painting, not as the finished rig.
What is the best auto rig tool for Blender?
The useful comparison is not skeleton quality but how much of the surrounding work the tool removes and which body plans it supports. Most automatic rigging is implicitly biped; if your project has creatures, check for quadruped, avian, serpentine and aquatic support before anything else. Mixar, a 3D editor built on Blender, runs auto rigging on the selected meshes with eight body plans selectable, fans a multi-object selection into one job per mesh, and imports each rigged result straight into the scene.
Do I need to retopologise before rigging?
Yes, for anything you intend to ship. Rigging a dense sculpt binds weights to geometry you are about to replace, so the work is discarded with the mesh. Retopologise to the budget the asset actually needs, rebuild the UVs, bake the detail down, and rig the mesh that will ship. Deformation is also where automatic retopology is weakest, so a character heading into a rig is the case that most deserves an artist over the topology.
Why do the limbs collapse when I pose an imported rigged model?
Almost always Blender's Guess Original Bind Pose option on the glTF importer. It tries to reconstruct the pose the mesh was modelled in, which is a reasonable guess for files from a pipeline that recorded it and the wrong one for a rig produced by an external auto-rigging engine. The model looks correct at rest and folds the moment a limb moves. Import with the option off. Mixar does this automatically for auto-rig results.
Can Mixar animate the rigged character or retarget mocap?
No. Auto rigging produces a skinned, posable model, and animating it is Blender's job: keyframes, the NLA editor, or imported motion applied to the skeleton. Mixar does not generate animation and does not retarget motion capture today. Choosing the Mixamo skeleton naming at rig time is the practical route if the animation you intend to apply expects that bone naming.