Automation guide
AI terrain in Blender: describe a landscape, get a procedural one
AI terrain generation in Blender: what gets built, the controls behind it, how a photo becomes a heightmap, and where it stops short of a terrain package.
Blender's own answer to terrain is a bundled add-on that displaces a grid with noise, which handles the landform and nothing around it. So landscape work usually means that plus a stack of nodes assembled by hand, or a separate application and a round trip per iteration. Mixar takes a different route: describe the landscape you want and the agent builds it in the scene as a geometry-nodes setup you can keep tuning, with the rivers, water and vegetation included.
Mixar is a 3D editor built on Blender, running on Windows, macOS and Linux, with the toolset, shortcuts and .blend files unchanged. Terrain here is agent-driven rather than a panel: there is no terrain tab to learn, you ask for what you want in the viewport and the result is a normal Blender object with a normal modifier stack.
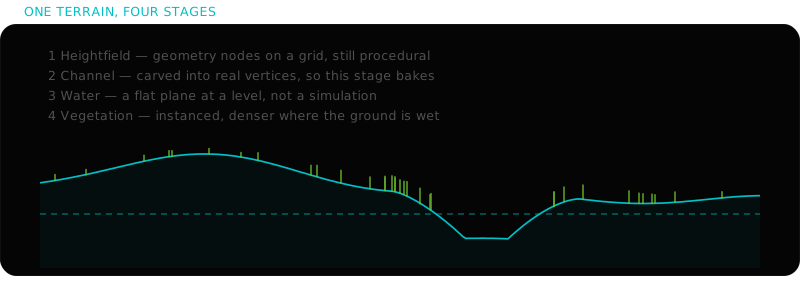
Below is what each stage actually builds, the controls behind them, how an attached photo becomes a heightmap, and where this stops.
Stage one: the heightfield#
The base terrain is a subdivided grid with a geometry nodes group on it, displacing Z from a noise texture. That construction matters more than it sounds, because it means the terrain is not baked: the controls stay live on the modifier and you can keep moving them.
- Presets
- Mountains, hills, canyon, desert or flat. Each is a starting set of the values below
- Height scale
- The overall relief, in metres. Flat ground is single digits; mountains and deep canyons are hundreds
- Detail and detail scale
- The amplitude and frequency of the surface noise, separately
- Warp
- Distortion of the noise, which is what stops ridges reading as regular
- Seed
- A different landscape at the same settings
- Resolution
- Grid subdivisions per side, 256 by default and capped at 1024
Resolution is the one to think about rather than maximise. It is subdivisions per side, so the vertex count is that number squared: the default is already a quarter of a million vertices, and the cap is over a million. Push it only for a hero close-up where the silhouette is genuinely under-sampled.
Stage two: rivers, lakes and paths#
Carving is a different kind of operation from everything above it, and the difference is worth understanding before you run it.
Cutting a channel or a basin bakes the geometry-nodes result into real mesh and then edits the vertices directly. The falloff is smooth, at full depth along the route and easing back to the original surface across a bank width you set, but the procedural stage is committed at that point. The consequence is practical: get the landform roughly right before you cut, because tuning the height scale afterwards is no longer a slider.
Before carving
The heightfield is live. Change height, detail, warp or seed and the whole landscape updates. Iterate here.
After carving
The mesh is real geometry with a channel cut into it. Rivers, lake beds and paths belong at this point, and the broad shape should already be settled.
Three operations live at this stage. A channel follows a polyline you specify, with a width, a depth and a bank falloff. That is a river, a stream bed or a ravine. A basin does the same radially from a centre point, which is a lake or a crater. A path lays a surface along a route rather than cutting into it.
Each also records where the water should sit, which is what the next stage and the vegetation both read.
Stage three: water#
Water is a flat plane at a level you choose, with a water material on it, sized to the terrain.
That is the whole of it, and stating it plainly is more useful than implying otherwise. There is no fluid simulation, no wave displacement, no shoreline foam and no flow. For a landscape shot where the water reads as a surface at a level, a plane with the right material is exactly right and anything more is wasted computation. If you need moving water, Blender's own fluid simulation is the tool, and it operates on this scene like any other.
Stage four: vegetation#
Vegetation is instanced onto the terrain with geometry nodes, from real asset files rather than generated geometry, and the density is not uniform.
Each biome is a set of layers (ground cover, undergrowth, shrubs, trees), and each layer carries a rule keyed on properties computed from the terrain itself: how far a point is from the water route, its height above the water level, its slope, and whether it sits below the waterline at all. Wet, flat ground near a river gets dense ground cover and trees; a steep dry ridge gets almost nothing. That is why a scattered scene reads as a place rather than as a texture.
- Biomes
- Riparian, grassland, meadow, forest
- Density inputs
- Moisture from distance to water, height above water, slope, underwater exclusion
- Instance budgets
- Capped per layer, with trees far lower than ground cover
- Placement
- Geometry-nodes instancing, so the terrain object stays one object
The caps are deliberate and worth respecting rather than fighting. A realistic tree asset is hundreds of thousands of polygons, and an uncapped scatter across a large terrain will not produce a lush landscape, it will produce a frozen viewport. The practical consequence: a vegetated scene wants to be modest in size. Around 60 to 120 metres reads as lush, where the same instance budget spread over 200 metres or more reads as sparse.
Turning a photo into terrain#
An attached image can drive the displacement directly. Hand the agent a photograph or a sketch of the landform you want and it becomes the heightfield: light areas rise, dark areas fall, scaled by a height you set.
Two details make this work better than it sounds. The image is blurred slightly before it is applied, because an ordinary 8-bit image quantises height into 256 steps and displacing straight from it produces visible terracing on shallow slopes. And when a heightmap is driving the terrain, the procedural noise is damped rather than removed, so you get the landform from your image with enough surface detail to keep it from looking like a smooth ramp.
Where this stops#
Being specific about the gap is more useful than a feature list, because the gap decides whether this is the right tool for your shot.
There is no erosion simulation. No hydraulic solver, no thermal weathering, no sediment deposition. Dedicated terrain packages build their realism on exactly that, and it is why their ridgelines and valley floors read as geologically plausible. Here the landform is noise plus the channels and basins you specify, which is genuinely enough for a background landscape, a game blockout or an establishing shot, and is not the same thing.
The material is colour, not texture. Surfaces are shaded by elevation and slope, with rock on the steep parts, ground colour below, and snow or sand depending on the biome, all as flat colours rather than textured PBR materials. It reads correctly at distance and it is not a close-up ground shader. If the camera comes down to the surface, texture it properly; AI texture generation covers that side, and tri-planar projection is the practical route on a mesh with no deliberate unwrap.
There is no real-world data import. No DEM, no GIS, no coordinates. If your terrain has to match an actual place, this is not the route.
There is no sky. The terrain ends at the horizon and what sits behind it is a separate problem with its own constraints, covered in generated 360 environments, including why a generated panorama is a backdrop rather than a light source.
There is no terrain-specific LOD or tiling. The output is one mesh at the resolution you asked for.
Against the alternatives#
| This | A.N.T. Landscape | A terrain package | |
|---|---|---|---|
| Where it runs | In the editor, briefed in words | In Blender, add-on panel | Separate application |
| Output | Geometry nodes, still tunable | A displaced mesh | Heightmap or mesh to import |
| Rivers and lakes | Carved from a route you state | Not addressed | Usually simulated |
| Erosion | None | None | The main feature |
| Vegetation | Instanced, density from terrain | Not addressed | Varies |
| Round trip | None | None | Export and import, every iteration |
Blender's A.N.T. Landscape add-on ships free and gives you a displaced grid with a good set of noise controls. It is the right answer when a noise-shaped landform is all you need. What it does not do is the rest of the scene: no channels, no water, no vegetation, and no way to describe what you want rather than dial it.
A dedicated terrain package with real erosion produces better landforms than either, and costs a round trip per iteration. Whether that trade is worth it is a question about how much the ground matters in your shot, which is the useful way to decide.
Where it sits in a scene#
Terrain is usually the first thing built and the last thing textured, and the agent treats it as one lane among several.
Landscape made entirely of natural landforms (mountains, a valley, a lake, dunes) is terrain work. Add buildings, props or placed characters and it becomes environment work, which is a different pass with different tools. Asking for both in one brief is fine; the split happens behind the scenes and the terrain is built first because everything else sits on it.
Terrain is one lane among more than a dozen, and the AI agent for Blender pillar is the map of the rest: the cleanup, retopology, UV and export passes that any asset dropped onto this landscape will still need.
Frequently asked questions
Can AI generate terrain in Blender?
Yes, and the useful question is what kind. Describing a landscape and getting a geometry-nodes heightfield, carved rivers, a water plane and density-driven vegetation is well within reach today, and Mixar does it as a briefed pass inside the editor. What AI is not doing is the geological simulation that dedicated terrain packages are built on: there is no hydraulic erosion, no sediment transport and no thermal weathering, so ridgelines come from noise and from the routes you specify rather than from a solver.
Is there a free terrain generator in Blender?
Yes. A.N.T. Landscape ships with Blender as a bundled add-on and produces a displaced mesh from a good range of noise controls. It is genuinely capable for the landform itself, and it stops there: no rivers, no lakes, no vegetation scattering and no way to state what you want in words. If a noise-shaped mesh is what you need, it is free and it is already installed.
How do I turn a heightmap into terrain in Blender?
Apply the image as a displacement source on a subdivided grid, either through a displace modifier or a geometry-nodes setup, with the image set to Non-Color so its values are read as height rather than colour-managed. Blur it slightly first: an 8-bit image has 256 height steps and displacing straight from one terraces on shallow slopes. In Mixar you attach the image and ask for it to be used as the terrain, and the blur and the noise damping are handled.
Does AI terrain generation include erosion?
Not here, and stating that plainly is more useful than a hedge. Erosion is a simulation of water flowing, carrying sediment and depositing it, and it is the thing dedicated terrain packages exist for. What you get instead is noise-based landform plus rivers and basins carved along routes you specify, which is enough for background landscapes, blockouts and establishing shots, and is not a substitute for a solver if the ground is the subject of the shot.
Can I put trees and grass on the terrain automatically?
Yes. Vegetation is instanced onto the terrain with density driven by the terrain itself: distance from the water route, height above the water level and slope, so riverbanks come out dense and dry ridges come out sparse. Four biomes are available. The instance counts are capped on purpose, because realistic tree assets are heavy enough that an uncapped scatter freezes the viewport rather than filling the scene, which is why a vegetated terrain is better kept modest in size than large and thin.